Wednesday, 18 December 2013

Central Front - BAOR - Turn 1 Phase 3

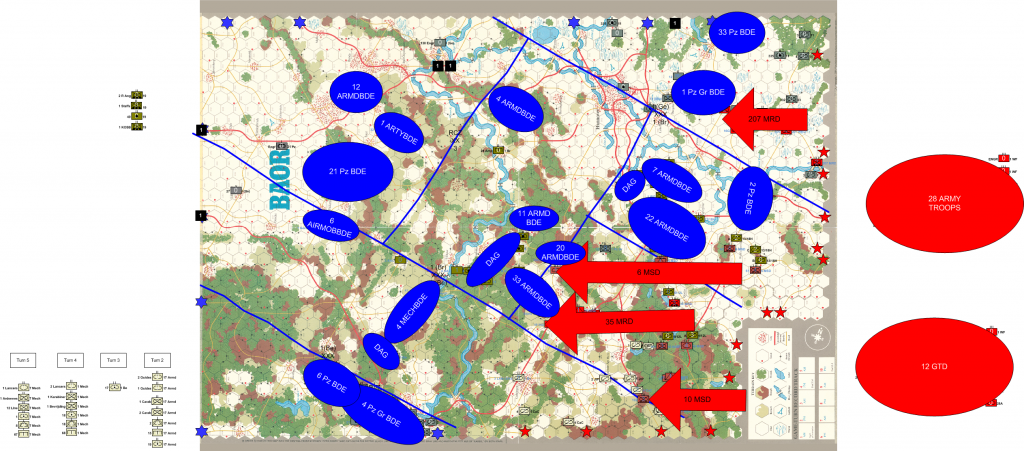
End of Op Phase 3 of turn 1 which equates to about 1200Z on the first day of World War III


The Belgians have won the race to the bridges and have also managed to get 3e Lancers into a blocking position in front of the lead MRR. Means that all my hard work painting Brits up has come to halt as it seems that Belgians are going to be where most of the action is going to be (less the 4 ARMDDIV meeting engagements for 20 & 33 ARMDBDEs

The next turn will see the WP 2nd Echelon armies arriving as well as 12 GTD for 28th Army and 35 MRD trying to push on. 10 MSD should also be able to push the Belgian Screen back as well allowing them to support the flank, but cannot really see them getting into a tangle for the Kassel crossings. 6 MSD I think is going to get a rough handling from the British but will need to watch their flank from the 2nd Ech stuff moving on.

There is a gap opening up between 1 and 4 ARMDDIV which could be exploited but that will need some timing to get right and 12 ARMDBDE may arrive in time to stop that avenue of approach. However, it may be time to launch some air assault now that the Brit deployment is firming up to cause it some problems.


Main problem I have is that I have a birds eye view of both sides and it is too easy to match the moves of one side. I haven't worked up any decision matrices for soloing this proper so it is being done on the fly. But I have managed to get a couple of "realistic" scenarios out of it so far.

Friday, 13 December 2013

Central Front - BAOR - Turn 1 Phase 2 (NATO Ph1)

So the turn of NATO to respond.

I chose to ignore the NATO paralysis rule as I feel that it doesn't appy in 1985.


I have chosen to include some NATO Op graphics to show some possible theoretical deployment areas and use these to force the NATO forces into some realistic game options.  The original BAOR game allowed NATO forces to be intermingled for example the 2nd Panzer Grenadier Division units around Kassel would have been allowed to move into the area southwest of the Harz, ignoring the fact that this was the Belgian zone of Operations.

Anyway, we are where we are on this.  NATO hasn't managed to get as far forward as I would have liked.  FWIW If I do this again I would allow the NATO forces a 6 MP deployment move (but end on their FP Side).

Situation for NATO is a mix of good and bad.

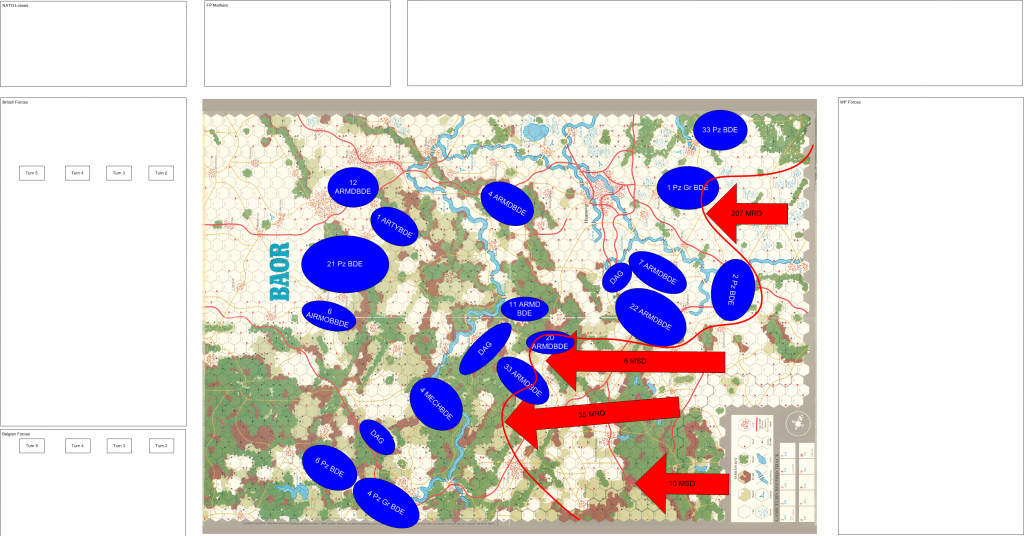
In the North 207 MRD is in for a hard time as it will attract the attention of probably 3 Brigade equivalents of the WG I. Ge Corps forces.  That is what I deployed it there for to draw off forces from the South.

6 MSD is a little bit bogged down facing 9/12L and 10 MSD is having real trouble clearing out the Belgian recce forces.

35 MRD looks the best option for the WP player as it is almost completely unopposed and NATO are going to have to push elements of 4 ARMDDIV hard to contain it.

1 ARMDDIV looks to be in a good position and will be able to hold its sector again if the WP don't swing North in their coming turn.

3 ARMDDIV are suffering from their rear basing but are likely to be able to reach their area while 1 and 4 ARMDDIVs take the brunt of the fighting.


Central Front - BAOR - Turn 1 Phase 2

6 & 10 MSD are suffering from Friction and are stalled somewhat. 6 MSD have now run into 20 ARMDBDE from 4 ARMDDIV
207 MRD is doing its job of being bait.
35 MRD despite showing early promise has now bumped into 33 ARMDBDE from 4 ARMDDIV.

Both sides look tired so probably will call end of turn and we will move to the afternoon of Day 1 with the WP still having air superiority. Whether I decide to throw some air assault in this turn remains to be seen. Both sides are looking for reinforcements, for NATO the next Belgian Brigade is due and the WP the 12 GTD is about to follow up probably behind 35MRD, but as it can be committed last it will reinforce the success (as per doctrine)

Game combats as meeting engagements which might make the table top……
RHG/D and 1 RRW up against the TR and MSR from 6 MSD (might try that as a 2,1 BG (RHG/D) vs the TR and a 2,2 BG (1 RRW) against the MSR or 3,1 RHG/D and 1,2 RRW (if people want to try out the different BG combinations feel free)

SCOTS DG up against an initial thrust by the 35 MRD Ind Tk Bn which has been thrown forward as a Forward Detachment with the 69 MRR adding its bulk to the engagement.

33 MRR/207 MRD against 14 Pz Bn supported by a Coy from the Recce Bn.


Wednesday, 11 December 2013

Central Front - BAOR - Turn 1 Phase 1

BAOR Campaign – Solo War Diary Race for the Weser

Initial Air Supremacy 21.2 – Decided to replace this with a simple roll off against turn number.  So on Turn 1 they have air supremacy but roll a D6 if the roll equals the turn number they are on then the following turn it is normal Air Supremacy.  This increases the Fog of War as this is being played solo.

21.4 Warsaw Pact March Order.  The deployment into Battle formation should only occur when attacking at least a NATO Battalion.  As such the WP must follow the March order until such a combat occurs.  This keeps the WP loosely aligned with doctrine.  RAG counter does not exist but may be replaced with a SP Arty Bn which can then be stacked with a WP Unit.

21.6 NATO Corps Artillery.  This SSR is not in force as there is no way of assigning the requisite orders to this in real life (AFAIK) so each Nation can only call upon assets of its own nationality.

22.4 Warsaw Pact paradrop options.  With the realignment of the 1 Be Corps units which were based in FRG in 1985 Option B only affects units of 1st Infantry Division.

Entry Hexes:

WP set up opposite the entry hexes prior to the WP Pre-Emptive strike rolls.

207 MRD will enter in one column using:
2751 :41 MRR, 33 MRR, DAG, Ind Tk, AT, 400MRR, 16G TR

6 MotorSchutzenDivision enter in two columns using:
1246: 61MRR, 63 MRR
1247: 62MRR, 62 TR, DAG, Ind Tk, AT

10 MotorSchutzenDivision enter in one column using:
0644 : 103 MRR, 101 MRR, DAG, Ind Tk, AT, 102 MRR, 10 TR

35 MRD enter in one column using:
0944 : 64 MRR, 69 MRR, DAG, Ind Tk, AT, 83 MRR, 219 TR

SSR 21.5 Warsaw Pact Pre-Emptive Strike.  The WP elected to conduct strikes against:
Celle/Scheuen
331      (6-1=5) down to a 4 as it is a battalion
333      (2-1=1)
334      (2-1=1)
Braunschweig
21        (4-1=3)
22        (4-1=3)
23        (3-1=2)
25        (1-1=0)
Hildesheim
1 RTR (1-1=0)
1 AAC (5-4=4)
14        (4-1=3)
11        (2-1=1)
Augustdorf
211      (2-1=1)
212      (6-1=5) down to 4 as it is a battalion
213      (2-1=1)
214      (3-1=2)
215      (3-1=2)
217      (5-1=4)
7 Aufkl (6-1=5) down to 4 as it is a battalion
Paderborn
1 QLR (1-1=0)
3 RHA (1-1=0)
3 RTR (1-1=0)
Detmold
4/7 DG            (5-1=4)
RHG/D            (2-1=1)
4 AAC (1-1=0)

Air Power Segment (4) so WP will have Air Superiority next turn as well.
12 AP

1 Interdiction Point 3942, 3936, 3521, 3520, 1130, 1131, 2101, 2901, 3939

Situation at the end of the WP 1st Movement Phase.